 USB Audio Devices" width="" height="" />
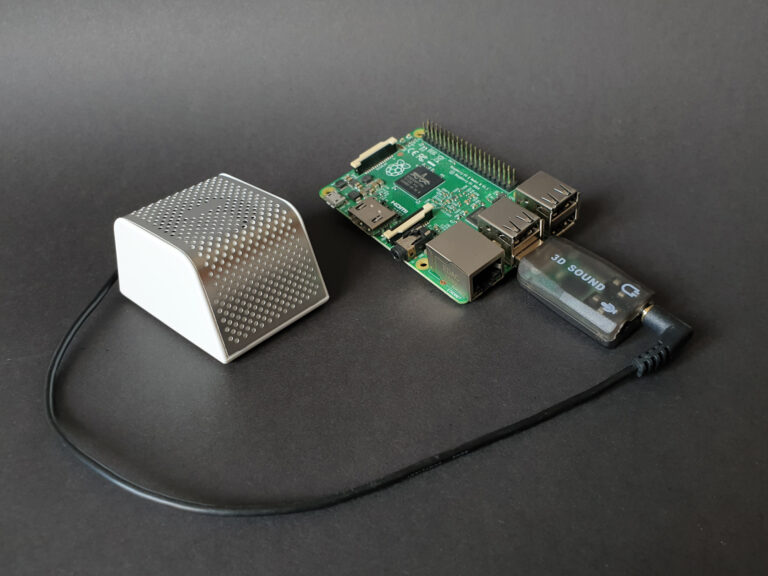 USB Audio Device and Pi" width="" height="" />
Additional sound capabilities can be added to a Raspberry Pi using a USB audio device. This can improve the sound quality as well as adding a microphone input. These devices can also be used to add audio capabilities to the Pi Zero which doesn’t include an audio jack as found on the larger Pi models.
The post will explain how to configure a USB sound device on the Raspberry Pi.
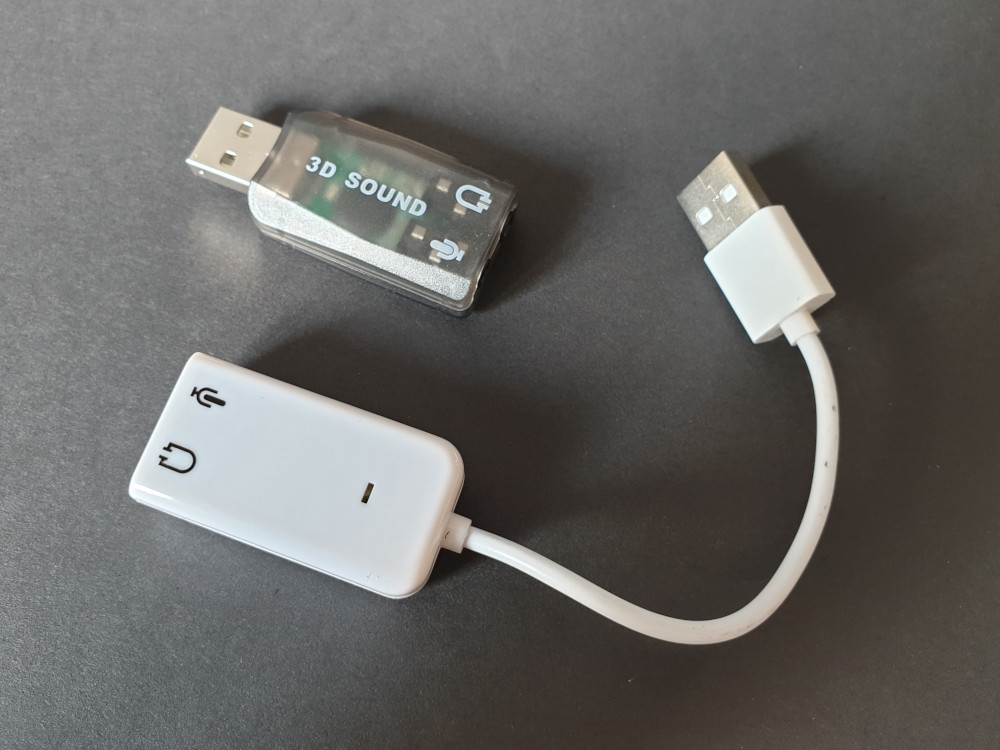
There are a number of different audio devices you can use with the Raspberry Pi’s USB ports. Here are two examples available online :
USB Audio Devices" width="" height="" />
They both use a “C-Media” chipset although the techniques shown below may work for other models.
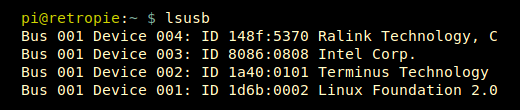
With the latest version of Raspbian these devices are picked up automatically by the operating system. Plug in the device and run :
lsusb
You should see an output similar to this :
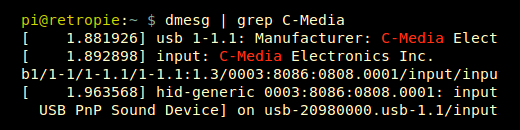
Running this command :
dmesg | grep C-Media
should give you an output like this :
Finally you can run :
aplay -l
which will list the audio devices registered with the system.
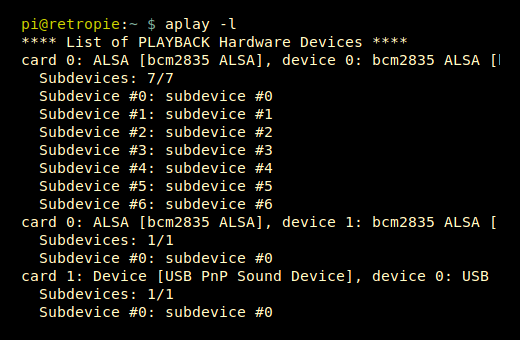
At this point we know that the device has been detected, is a C-Media type and is considered “card 1” by the audio sub-system.
The USB sound device can be made the default audio device by editing a system file “alsa.conf” :
sudo nano /usr/share/alsa/alsa.conf
Scroll and find the following two lines:
defaults.ctl.card 0 defaults.pcm.card 0
Change the 0 to a 1 to match the card number of the USB device :
defaults.ctl.card 1 defaults.pcm.card 1
To save the file and return to the command line use [CTRL-X], [Y], [ENTER].
Previously in older versions of Raspbian you had to edit /etc/asound.conf and add the following text :
pcm.!default < type hw card 1 >ctl.!defaultTo check the speaker and microphone are not muted you can run Alsamixer using :
alsamixer
This should show you a gauge for “Speaker”, “Mic” and “Auto Gain Control”.
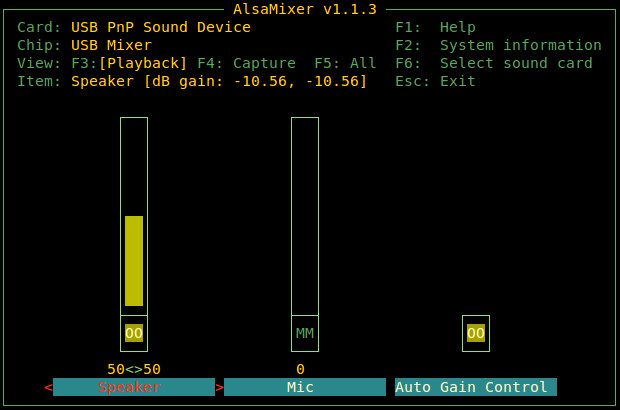
Using the arrow keys you can adjust the gain of both channels and turn auto-gain on or off. A channel can be muted using the M key. “MM” appears if the channel is muted. Press “ESC” to return to the command line.
With headphones or a speaker plugged into the headphone socket on the dongle you can use the simple speaker-test utility :
speaker-test -c2
speaker-test -c2 -t sine -f 500
You should hear white-noise or a 500Hz tone.
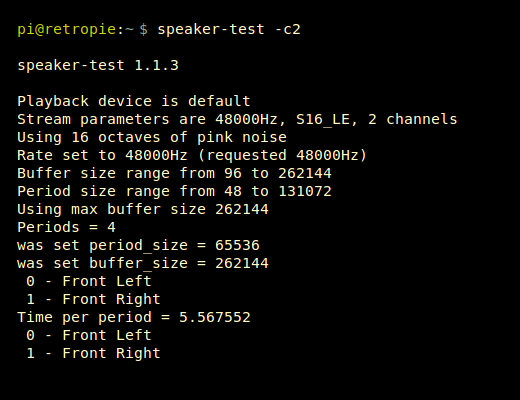
Press CTRL-Z to exit the test.
Almost there! If you want to play a test sound file you can download a test OGG file using :
wget https://www.kozco.com/tech/piano2.wav
and then play using :
aplay piano2.wav
Finally as you have installed some packages and edited the .asoundrc file reboot to ensure all changes are active. The speaker-test command can sometimes result in “Device or resource busy” errors so a reboot it useful at this point :
sudo reboot
The casing on these devices is easy to remove and inside they are very similar.
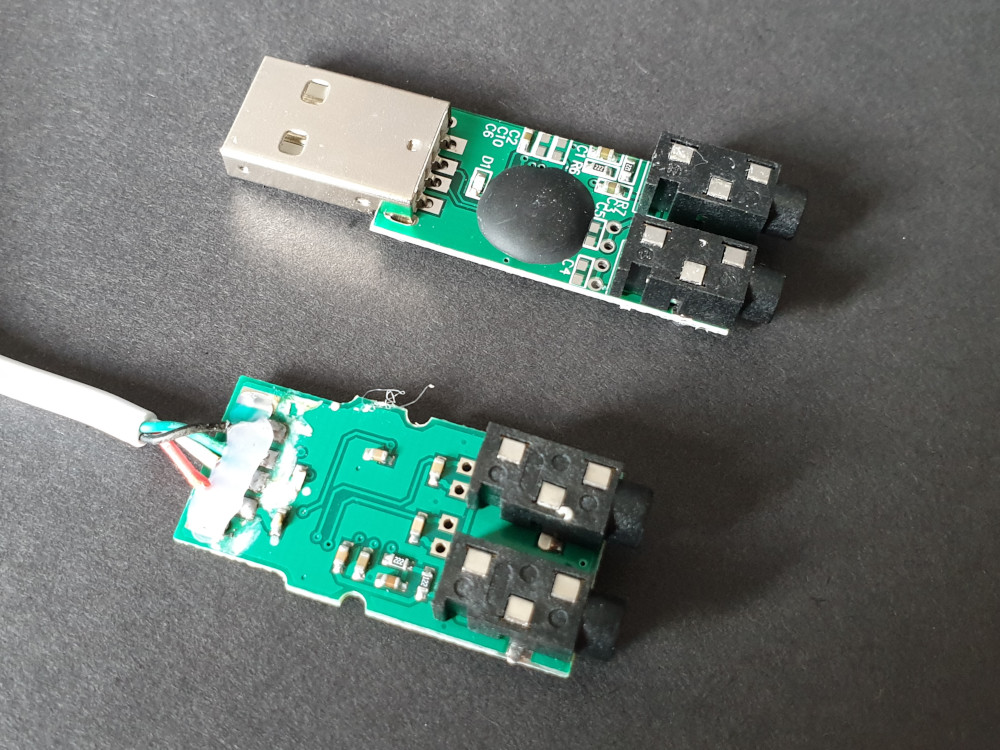
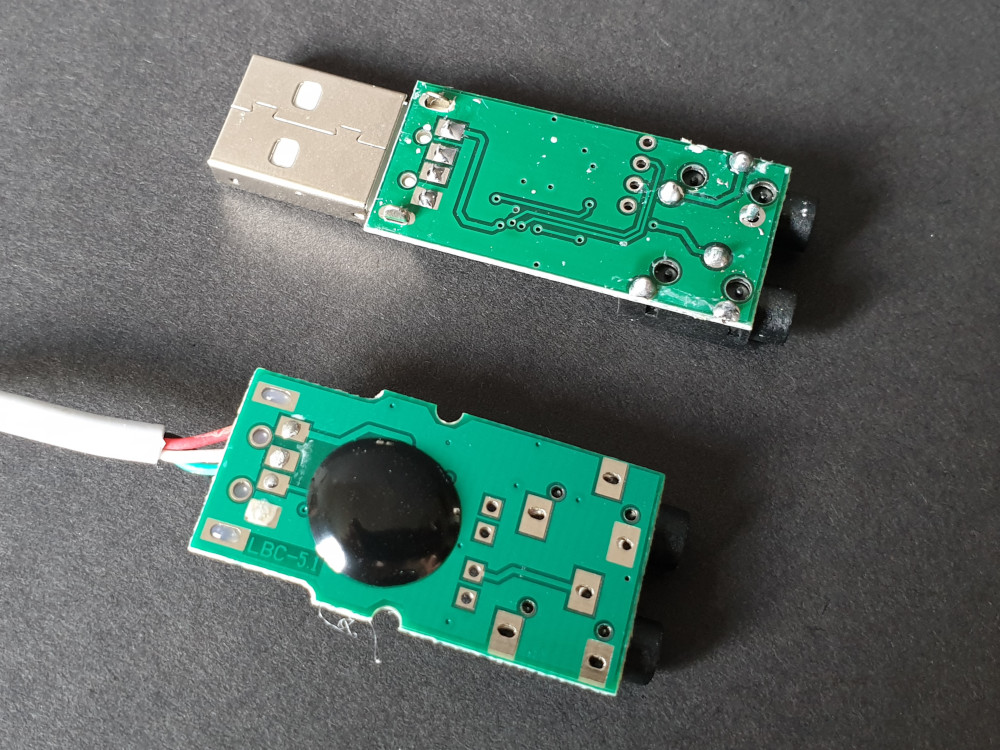
If space is a premium you can de-solder the USB and 3.5mm jacks and solder wires directly to your Pi. An example of where you might want to do this is in a handheld gaming system based on the Raspberry Pi Zero.
Here is a diagram showing the “3D Sound” audio module PCB connected directly to the USB port on a Pi Zero :
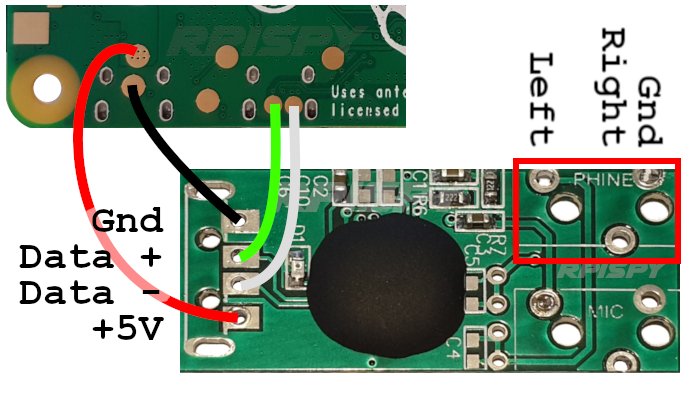
The gold circles on the rear of the Pi Zero are test points. On the original Pi Zero PCB these test points are labelled PP1 (5V), PP6 (Gnd), PP22 (Data+) and PP23 (Data-). Wires can be directly soldered to them as an alternative to using the microUSB connectors.
Keep the wire as short as possible to minimise the chances of interference. Twisting the two data lines should help with reliability.
These USB sound adapters are available from all the usual online electronic accessory retailers :