
While planning where we would be going in South America we talked a lot about wanting to go to Bolivia. The landscape of this often looked over country is so impressive. If you haven’t seen a picture of the Bolivian Salt Flats (Salar de Uyuni) go Google it and then come back. But as a US citizen we need a Bolivian visa in order to enter the country and as we started researching we got more and more confused. So this post is a full guide for how to get a Bolivian visa as a US citizen.
We honestly kept pushing off doing our Bolivian visas because it seemed so daunting and confusing. What we kept finding online was similar but not completely the same and was very vague. When we did find information it was often loosely translated from Spanish to English so hopefully this post helps answer some of the unknowns!
This post is specifically aimed for US Citizens who are looking to go to Bolivia. If your home country is not the US make sure to check first if you need a visa as visas are not required for all countries.
In general it was difficult to find concrete and up to date information regarding what was required. Usually the US Travel.State.Gov website is where we look for complete visa information. But if you click on Bolivian Visa it brings you to the US Embassy in Bolivia page. The information is not too helpful because all the information was for the embassy in La Paz, Bolivia.
So you need to go to the website of the Bolivian Embassy in the US. That’s where you will have access to start the online application and get actual information. Below are links to the embassy websites. You might be thinking thats silly that they put links to the embassy websites. But we ran into so many broken links while trying to get started!
We read some peoples experiences of getting to the border (most times going from Peru into Bolivia), giving the required documents and getting a Bolivian visa on arrival at the border. But everything we found about doing it at the border seemed like a hit or miss depending on the agent and circumstances of the day. We didn’t feel confident enough with what we knew to risk it and try to do it at the border.
Another major factor in getting a visa on arrival is that you need to bring $160 in US dollars in PRISTINE condition. We read multiple stories about people having their money turned away for even so much as a fold. Since we are heading to Bolivia right after hiking the Inca Trail we figured this requirement might be difficult to meet.
Travel Truth: We want to point out that we read peoples experiences that WERE able to get a visa as a US citizen at the border. So I suppose it is possible we just didn’t feel confident enough to go ahead with that strategy. It depends on your travel style and flexibility!
Getting a Bolivian visa ahead of time, however, means completing an online visa application, compiling all the required documents and mailing it into a Bolivian embassy. It says you can also bring it into an embassy office but your options are Los Angeles (CA), Miami (FL), Houston (TX), New York City (NY) or Washington DC and for us mailing was the best option.
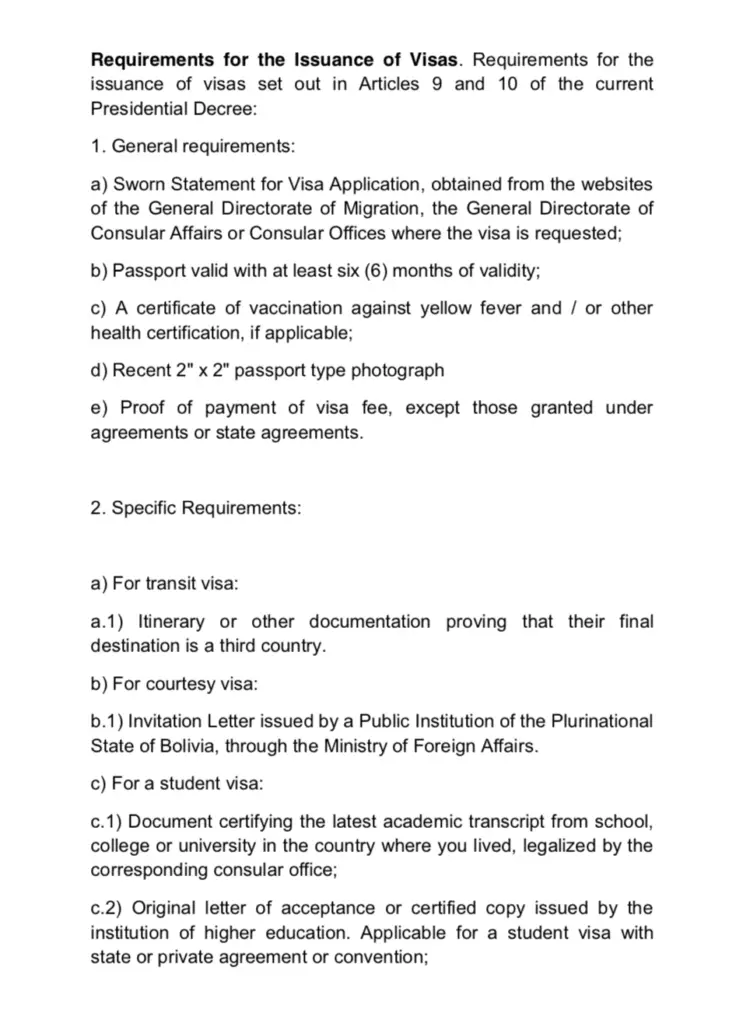
First, lets start with the requirements in order to apply and successfully be issued a Bolivian visa. You will notice if you visit all of the embassy websites above they all include the same requirements but the detail given for each item differs.
You must have a valid passport that has at least 6 months validity remaining.
You can get passport pictures done at CVS, Rite Aid, AAA, etc. that will take the correct size photo. It should cost anywhere from $7-$10 for a set of 2 photos.
This is a part of the online application that you need to print off and sign. We’ll get to how to fill out the online application below!
Basically both the hotel reservation and plane ticket/itinerary are to provide information about your length of visit, what you plan to be doing and when you’re leaving the country.
When we started looking into the visa we didn’t have a hotel reservation or plane ticket booked so that made it a bit more of a process. We read a post saying someone put just the name of the hotel they would be staying at but not an actual confirmation (because they had not completed the booking yet) and it worked. Just in case anything changed we booked all of our accommodations on Booking.com so we had free cancellation.
We submitted the booking confirmation for the hotel that Booking.com sent us. Just make sure the reservation has the name of all the travelers on it. For example, we made sure it had both Dave and I listed as guests not just the person who did the actually booking online. Booking.com will let you add this before you finish the reservation process.
If you have Bolivian friends/family that you are visiting and planning to stay with, you need a invitation letter with specific information about the location.
Travel Truth: If you’re not sure where you want to stay book a place with free cancellation and go from there! Then at least you know you won’t be charged if something changes.
This is extremely vague which made it really difficult to figure out what they actually wanted. Because we’re traveling for a year we weren’t booking a round-trip ticket to return to the US. We also were coming from Peru first not from the US. If your trip is not as long it most likely won’t be a problem to include your return flight back. It’s really just proof that you are in fact leaving the country.
We sent a confirmation of our flight from Peru (where we’re coming from) into Bolivia. Then we also sent a confirmation of our flight leaving Bolivia going to our next destination which is Argentina. With such a long trip (and this being the very beginning) there was no way we could include a flight reservation going back to the US.
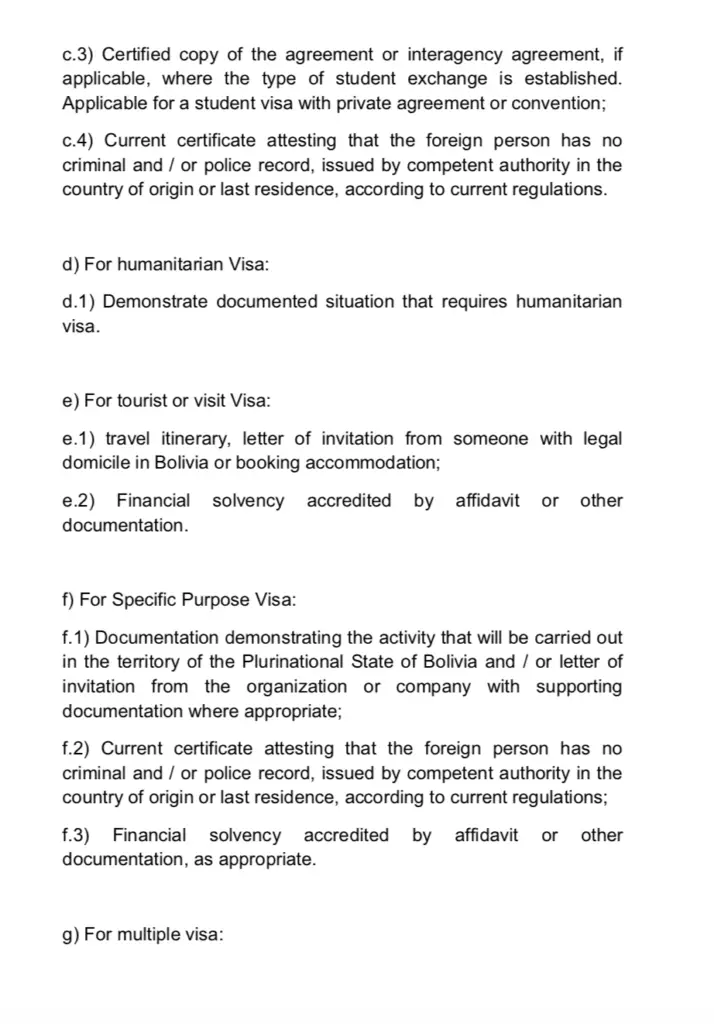
For the travel itinerary we literally typed up our rough itinerary in a word document. We included the dates, where we would be, and included both the flight and accommodation information even though those were already separate components. We planned to do a tour of the Bolivian Salt Flats but we didn’t have it booked yet. So we just put “3 day salt flats tour” next to the correct dates.
The last requirement for the visa is proof of economic solvency which is a fancy way of saying they want proof that you have money in your bank account to pay for yourself until you leave Bolivia. A recent bank statement is what we gave.
The fee for the visa is $160 and must be paid with the application. You can pay the fee either through a money order mailed with your application or complete a separate authorization form to give your credit card information.
When you are applying for a Visa to Bolivia, one of the steps is applying through the consulate website for the location that you are applying to. For us, it was the New York website.
Once you get there navigate to “Consular Affairs” and then “Tourist Visa” shown below

At the bottom there are two links. We started by clicking the “Start Here” button which will take you to this page:
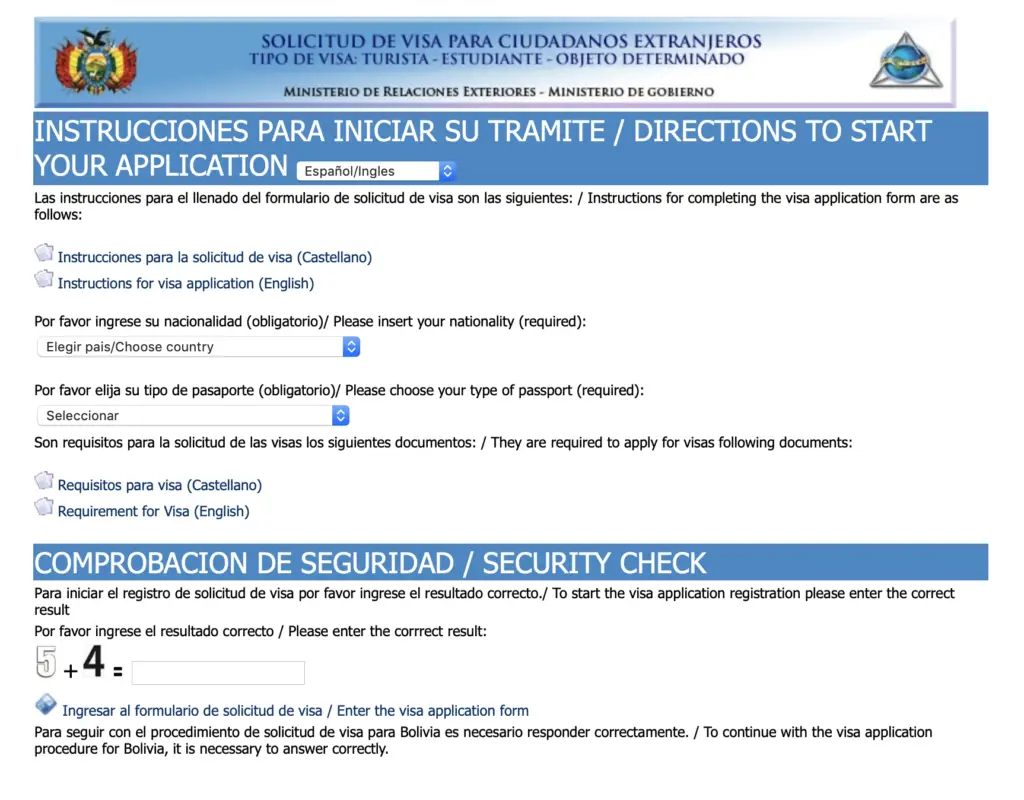
There is a useful link marked “Requirement for Visa (English)” that has all the required documents, etc. for your Visa! We used this as our checklist.

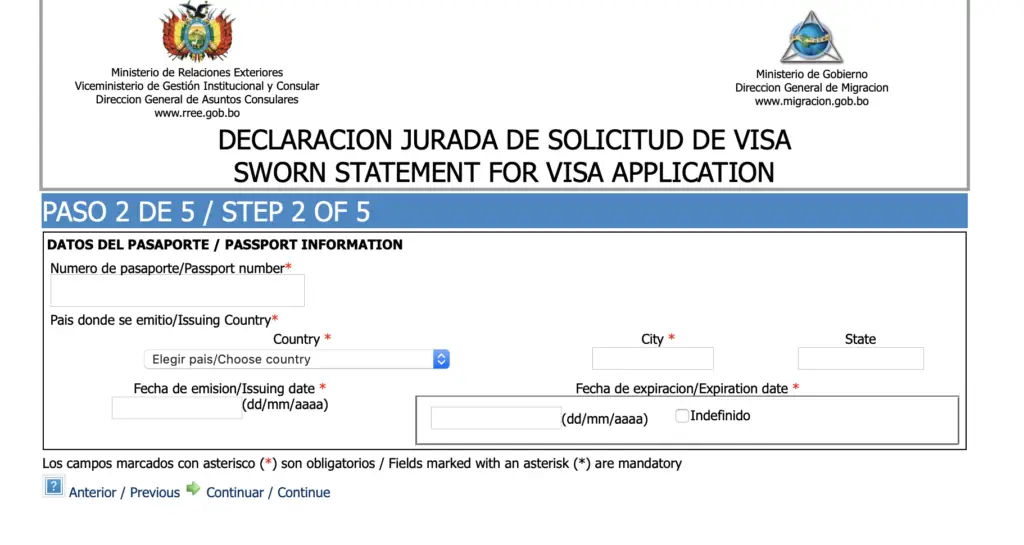
Once you are finished reading and filling out the couple of areas you will click “Ingresar al formulation de solicited de visa / Enter the visa application form” which will take you to the following page, the Sworn Statement for Visa Application. This is also where you upload your passport photo. We will explain the process below.
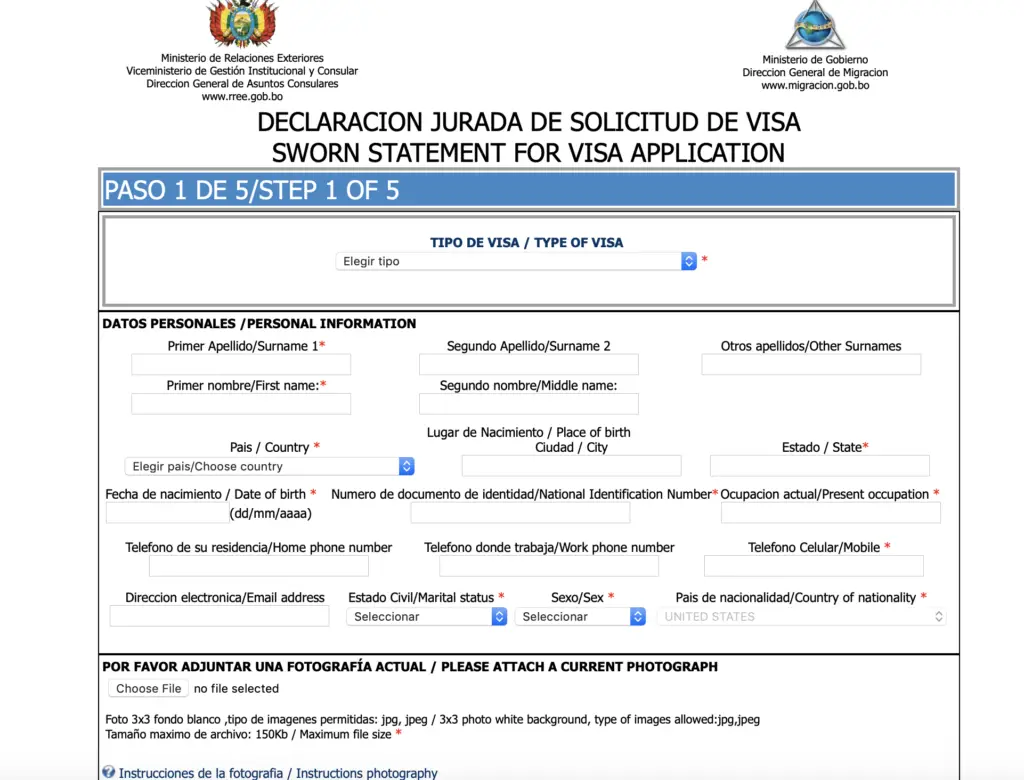
At the top we selected the option for Tourist Visas for the United States and Puerto Rico and then filled out the rest of the information below.
For the passport it specifies a few requirements for the photo. We had extra passport photos that we had purchased for the trip so we used a generic printer/scanner to scan the photos. Then I took the photo into Lightroom (any photo editing app will do) and cropped out the white space around the picture so the file was just the actual passport picture. Then I uploaded the picture. The quality was not great but it worked fine because everything was approved.
Next you will fill out your passport information (below)
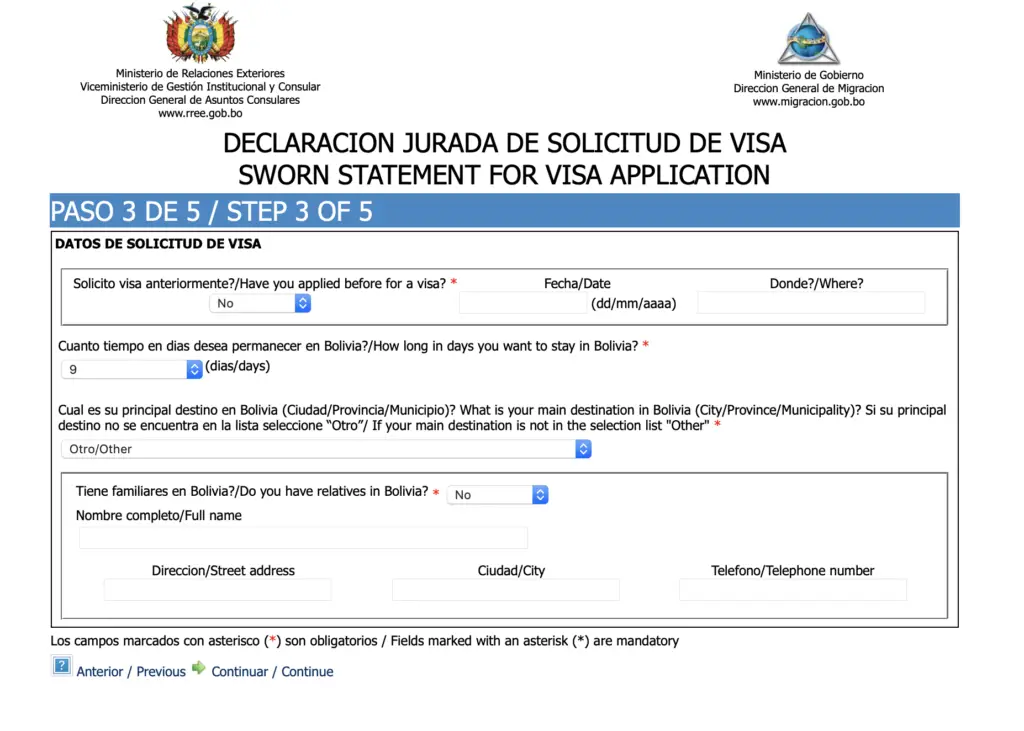
The next step asks if you have ever applied and how long you are staying in Bolivia as well as where you are staying. For this section there were a ton of different options that looked to be in a city/county sort of pattern but we could not figure out which was the most accurate for us. None had just “La Paz” or “Salar de Uyuni” so we checked off “Other”. This made us a little nervous that we would be flagged but we did not want to risk putting down inaccurate information that did not match up with our travel documents.
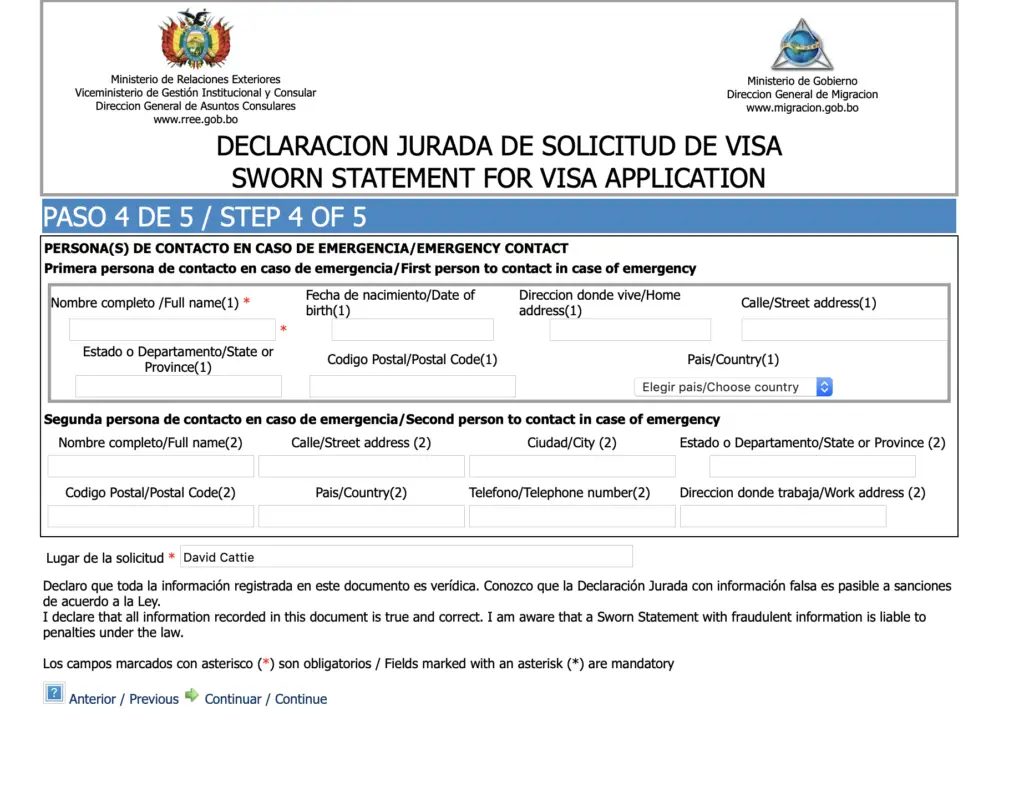
The next section is for emergency contacts. We put each other as well as our parents so there would be a contact at home just in case.
The last section is where you upload all of the documents. For our “Itinerary” document we merged together one large PDF that included all of our information including our written itinerary, flight confirmations, and hotel reservations. The other section here that was confusing was the documented economic solvency. We had heard people using credit card statements but we both used bank statements from the previous month. We just made sure to cover up all the sensitive account information.
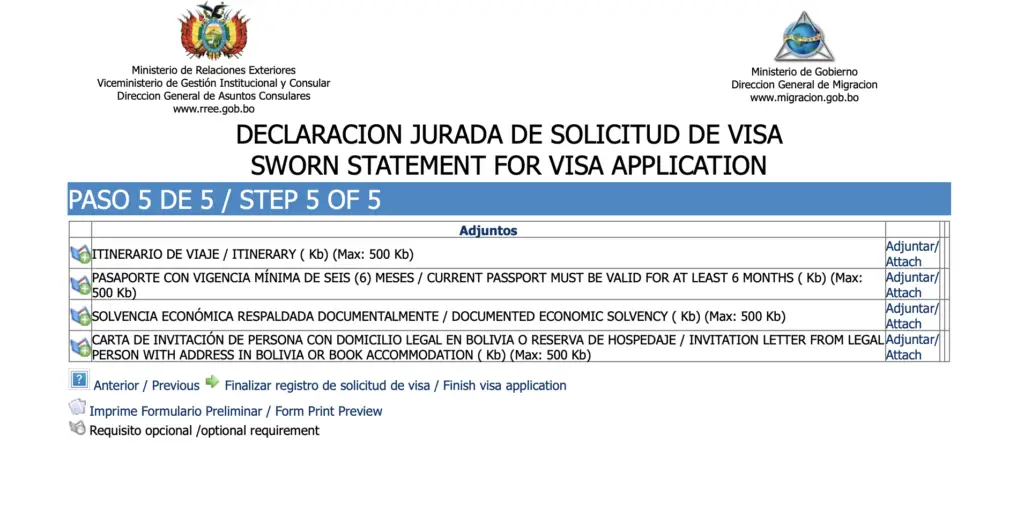
Once we were done it gave us a PDF copy of our application/sworn statement which we printed out to mail with our passports and other documents.
After filling everything out online we started working on the mailing process. For this we had our main envelope (with tracking), a prepaid return envelope inside (also with tracking), our sworn statement, copies of our itinerary, flight confirmations, and hotel confirmations, as well as our passport, yellow fever card, and 1 passport photo. We also included our money orders which we got from the US Post Office.
Because we got tracking on the envelope, we kept a close eye on it to make sure it arrived there. One and a half days after arriving, they had mailed out the return envelope that we enclosed with all the other documents. It took a few days in the mail to get back to us and especially depends how close to the embassy you live.
In the return envelope was our passport with the Bolivian visa attached to one of the pages as well as the passport picture we submitted. We’re not sure why we needed to send a passport picture if they didn’t keep it nor does the visa have a picture on it. But we were very excited to have successfully gotten our Bolivian visas in such a short amount of time! We had read 4-5 weeks and weren’t sure how accurate that was but it was so much quicker than we ever could have anticipated.
We’re Nicki & Dave! In 2019 we sold everything, packed our backpacks, and set off on an adventure around the world! We spent 2020 converting a Ford Transit van and we’re now traveling around the US in our home on wheels!
Here you’ll find travel guides and itineraries, tips we’ve learned along the way and our must have travel items! Our goal for Truth of Traveling is to show you travel doesn’t have to be overwhelming and can be done on a budget!
You’ve seen pictures of van life, maybe you’ve rented a van for a week and you’re ready to jump in. Now what? Next comes deciding what type of van to buy. In the US there are 3 popular vans that people convert and live in- Mercedes Sprinter vans, Ram Promaster vans, and Ford Transit vans. […]
There are so many amazing places to visit in Europe that it can be hard to choose! Because countries are so close together it’s easy to travel from beautiful beaches into the snow covered mountains in just a few hours. Which means you can pack a whole lot into a short amount of time! Here […]
Travelers are often hard people to buy gifts for. When we told our families we were going to sell all of our stuff to travel, it made gift giving a little tricky. We wanted less “things” and more opportunities to travel which is hard to gift wrap! But every traveler has a few things that […]
Horseshoe Bend is a beautiful horseshoe shaped formation in northern Arizona. It is absolutely beautiful and crazy to think about how it has been formed throughout thousands and thousands of years. This post gives you everything you need to know about visiting Horseshoe Bend including fees, parking, and how far of a hike it is […]