
Do you remember making paper snowflakes as kids? Something as simple as a piece of paper and a pair of scissors can create so much magic!
Today we are revisiting this beautiful paper craft for everyone and favorite winter activity for kids: how to make 6 pointed paper snowflakes that are easy enough for kids to cut, and elegant enough to decorate your home for winter and Christmas.
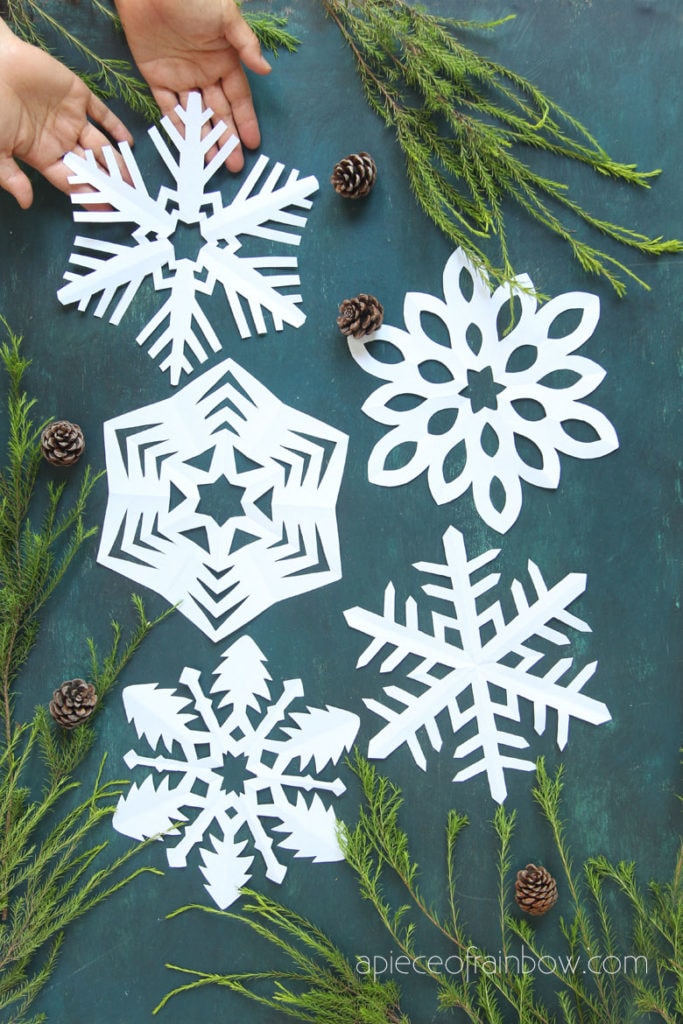
Since snowflakes in nature are 6 pointed, that’s what we will make today. You can use the free templates to make 8 pointed snowflakes, with a slightly different fold in Step 3.
*Some resources in article are affiliate links. Full disclosure here.
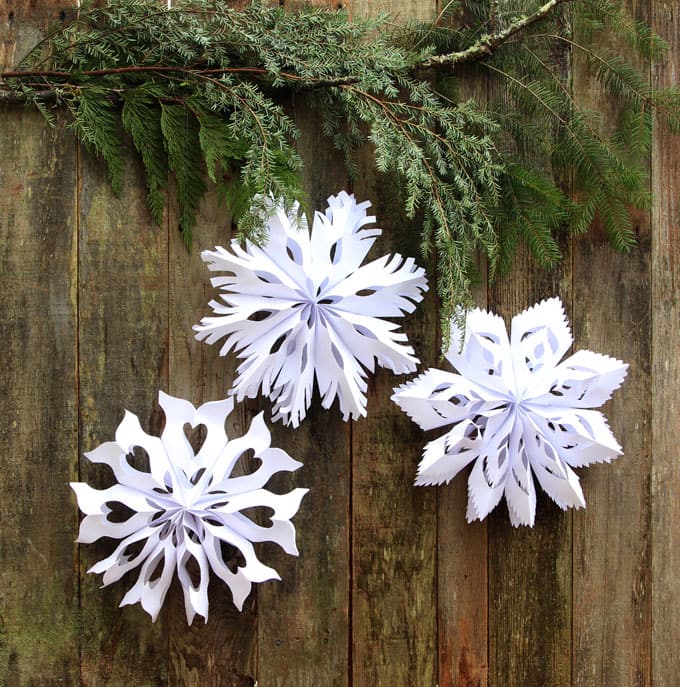
If you want to make 3D paper snowflakes, here’s our tutorial on how to make big lighted 3D snowflakes.
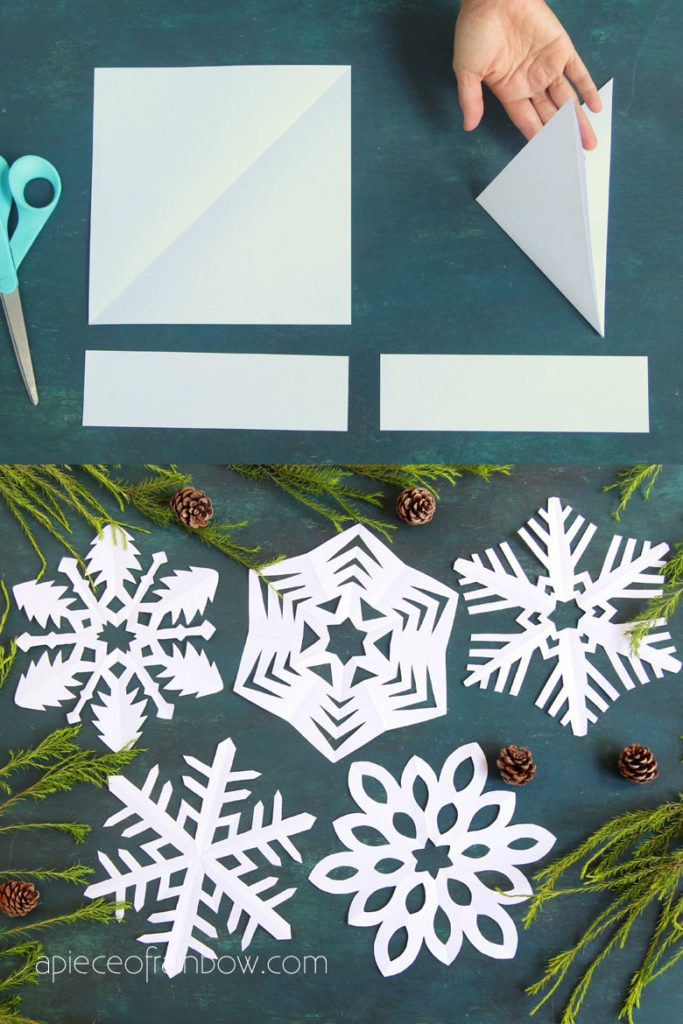
Start with a square piece of paper. Fold the square diagonally in half to form a triangle.
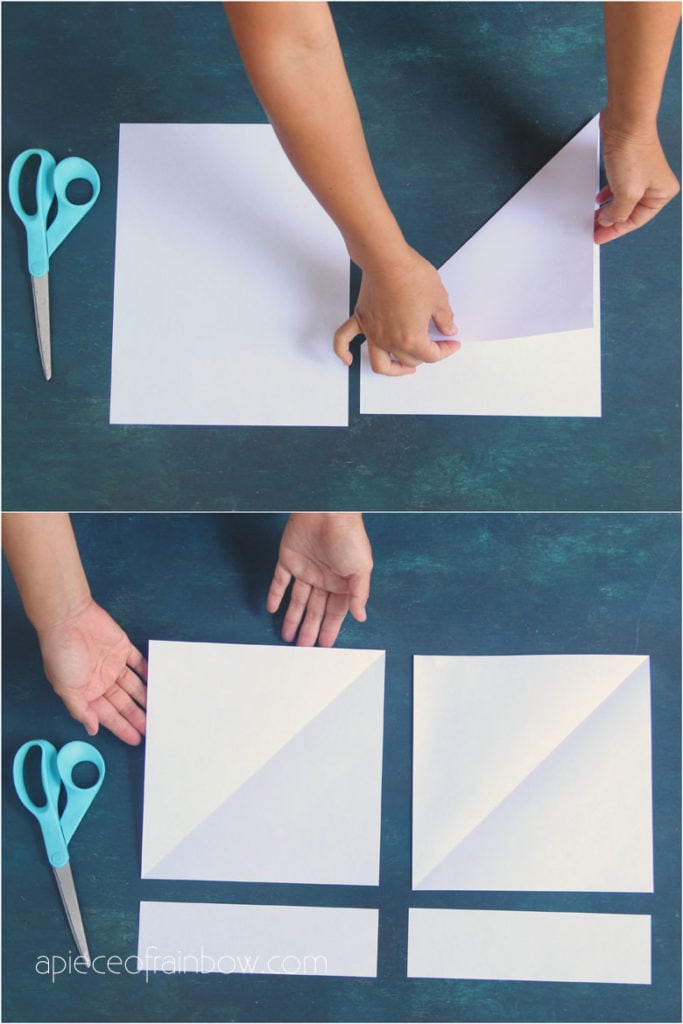
You can also easily make a square sheet of paper from any rectangular paper such as 8.5″ x 11″ Letter size. Just fold one corner to meet the opposite edge, forming a triangle, and cut the excess paper outside the triangle, as shown in photo above.
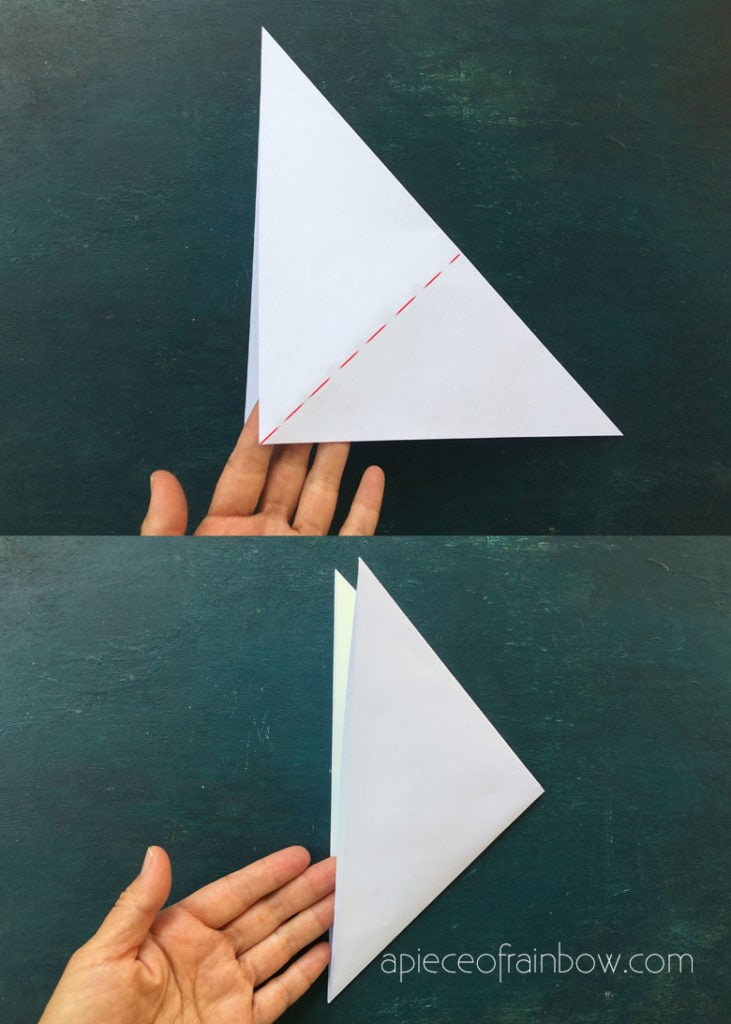
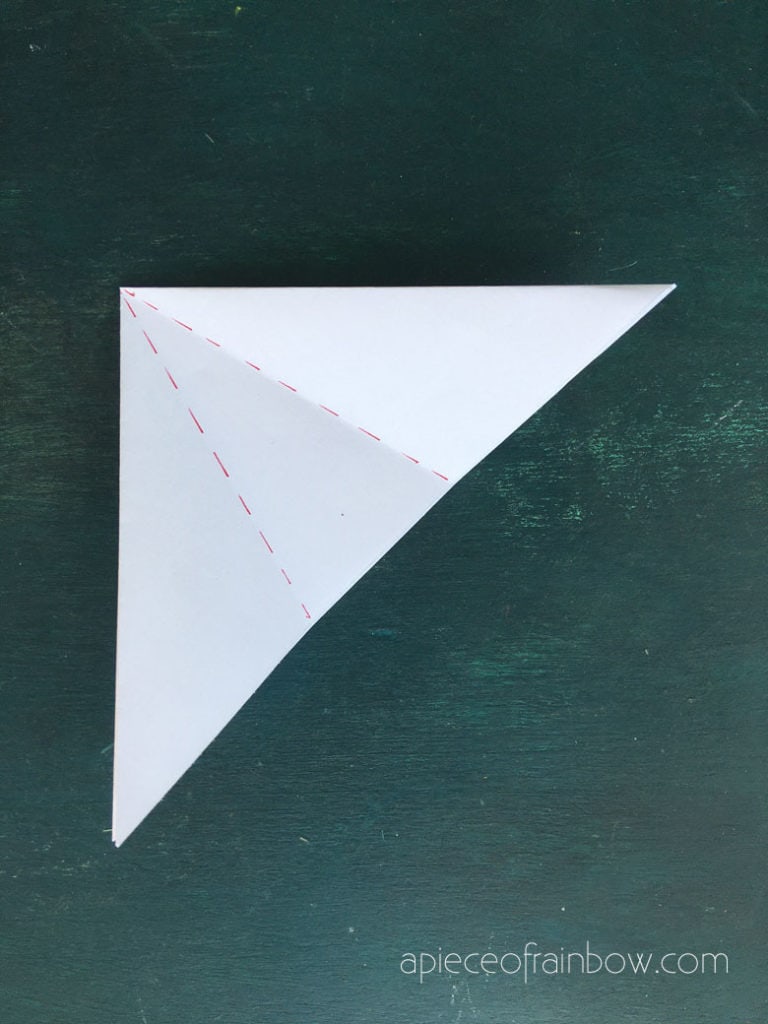
Fold the large triangle (from Step 1) in half to make a smaller triangle. As shown along the dotted line.
Helpful tip: as we fold the triangle into smaller triangles / wedge shapes, we are dividing the square paper into equal parts through the center point. You can create 6-pointed, 8-pointed, or 12-ponted snowflakes etc, just keep folding from the apex which is also the very center of the paper.
To make 6-pointed paper snowflakes, divide the small triangle into three equal sections at the 90 degree apex point (also the center of the square paper), each section has a 30-degree angle.
You can use a protractor, or just estimate the size of the sections, which is what we did here. It’s quite easy, check out the video tutorial above if you are not sure about this step.
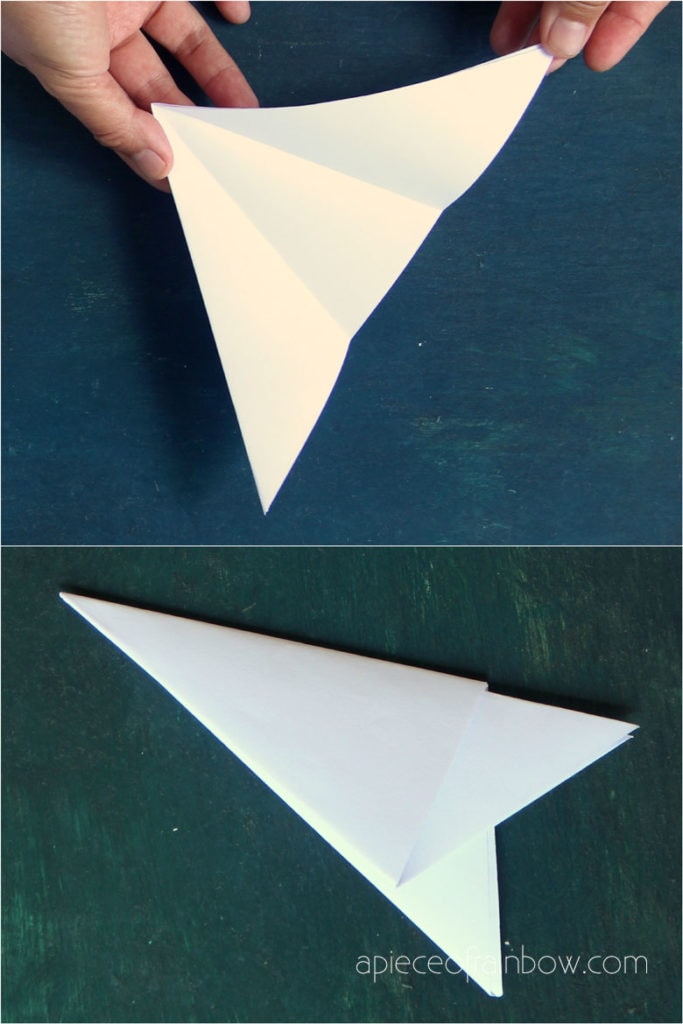
Fold the left section towards the front. Then the right section. Try to match all the edges as closely as possible. Now we are ready to cut our snowflakes.
If you want to make 8-pointed snowflakes, you would fold the small triangle in 1/4, instead of 1/3 at the apex point, and proceed to Step 4.
The possibilities are endless here. You can cut any shapes on this folded wedge ( just keep the shapes connected at places along the side edges) and be delighted as you open the paper into a big snowflake!
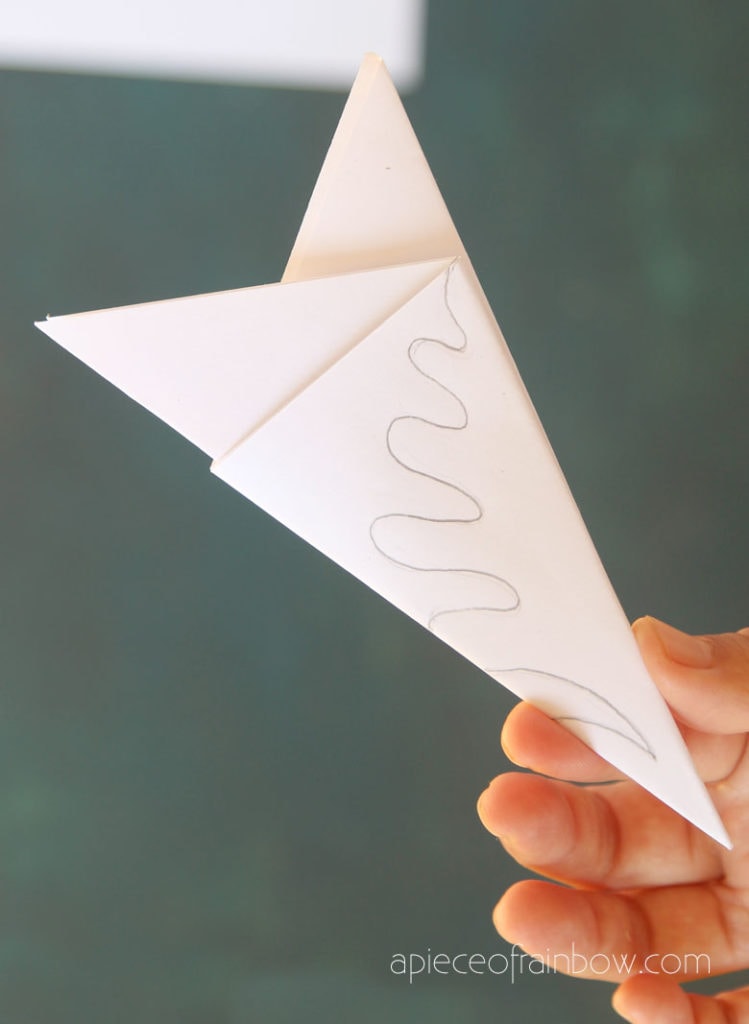
It is helpful to draw a design on the wedge first with light pencil lines, then cut it out, especially if you want to make elegant paper snowflakes for winter and Christmas decorations.
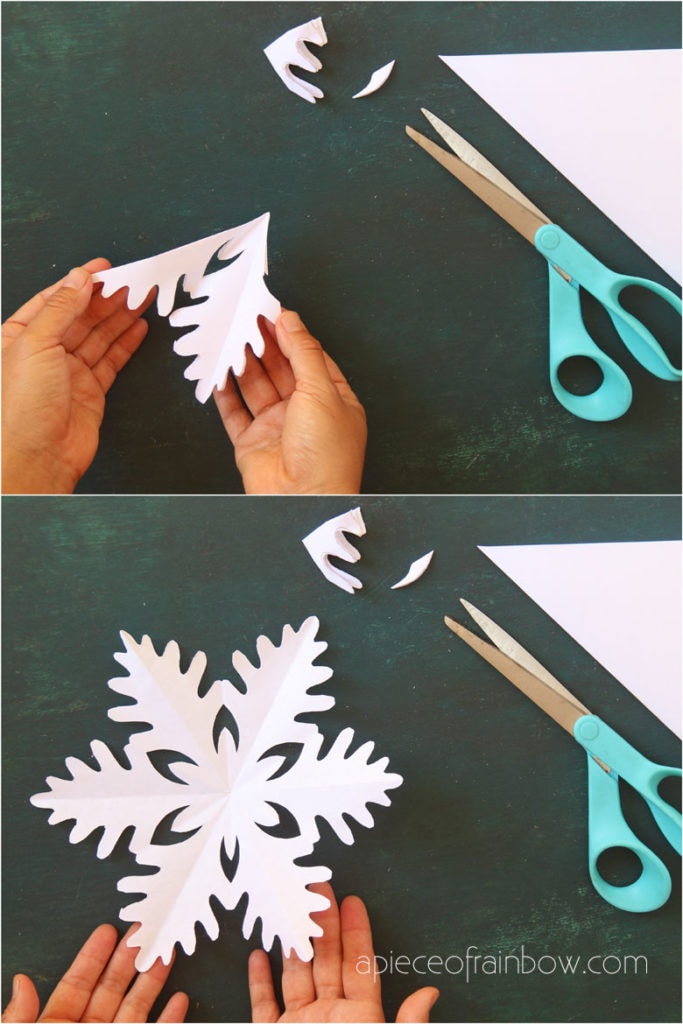
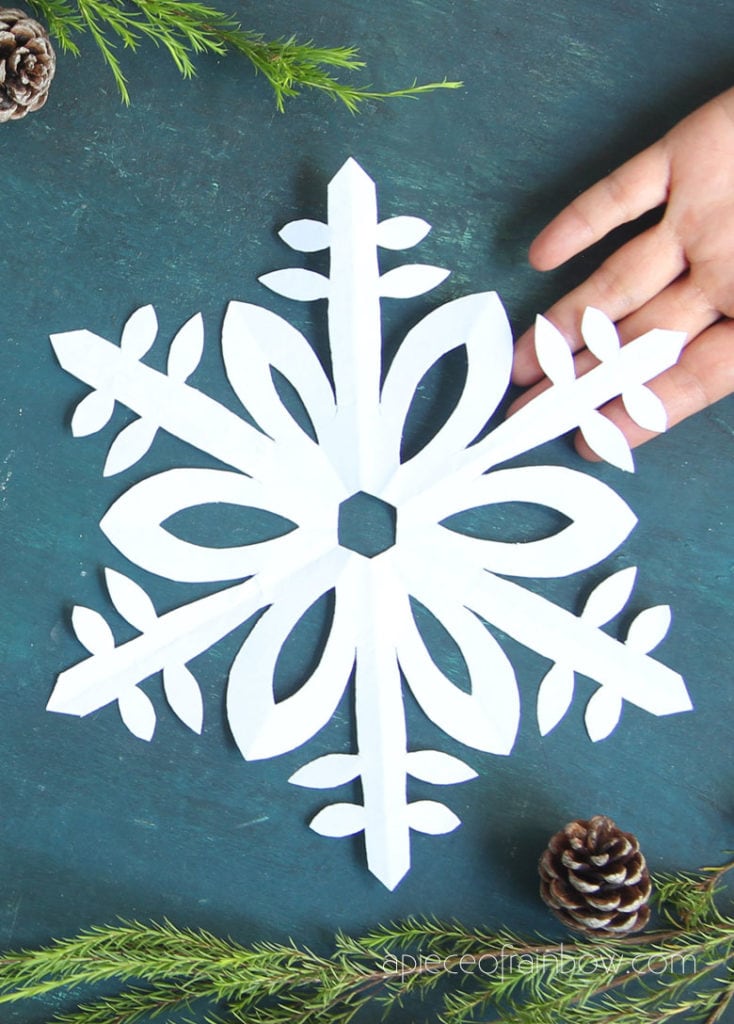
Open the cut wedge very carefully into a big paper snowflake! You can download our easy-to-cut and free templates at the end as guides to draw and cut your paper snowflakes, or create your own patterns.
Keep your paper snowflake sandwiched between pages of a large book or magazine fora day or two. This will flatten the paper snowflakes, and is also a great way to store them.
 best paper snowflake free templates" width="683" height="1024" />
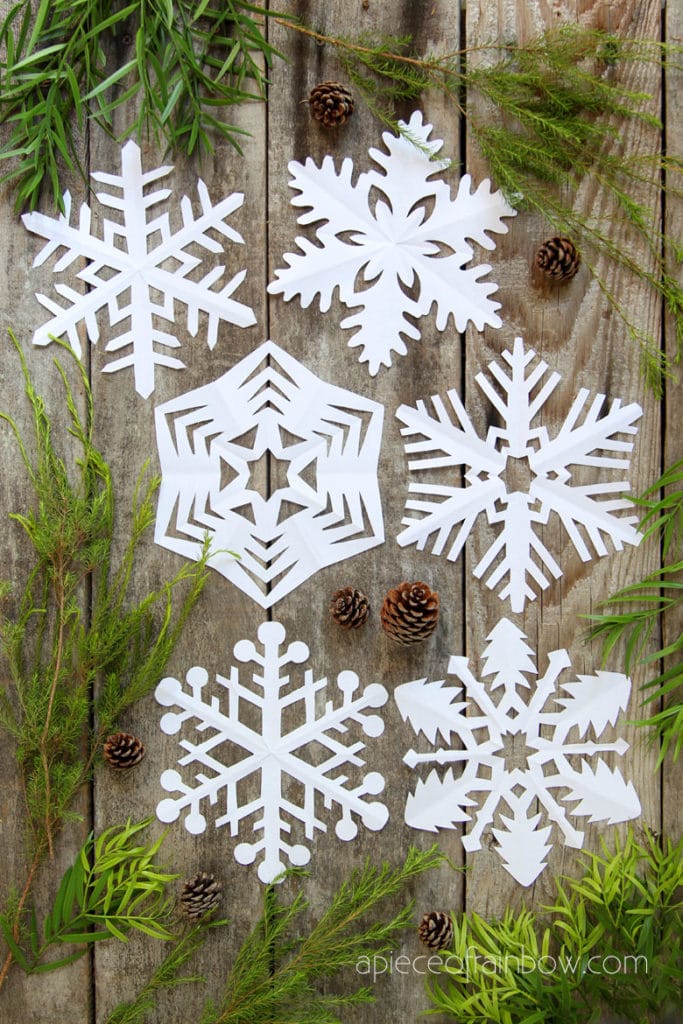
There are so many fun ways to use your paper snowflakes for winter and Christmas decorations, and gift giving.
You can tape them to windows, walls, and doors, make a snowflake table runner, use them on your gift bags and gift boxes, make holiday and Christmas cards, etc.
You don’t need this step to hang the snowflakes, but if you want a little extra weight and stiffness, it’s very easy to do!

Mix together 1 part room temperature water, 2 part cornstarch or flour starch, and 2 part white glue. ( No need to cook the starch.)
Brush this mixture on one side of the paper snowflake, let it dry on a clean sheet of plastic. Then repeat on the other side.
This will make your paper snowflakes much more stiff.
If you are already a subscriber, you can download all past and future free goodies on our subscribers downloads page! The link is always in our weekly newsletter and in the welcome email when you sign up!